Hello all,
Thanks for all the images.
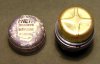
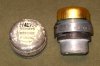
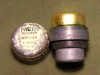
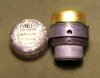
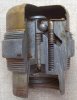
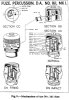
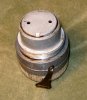
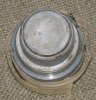
I think I may have committed a collectors crime, ie; I removed the locking grub screw,and safety pin, but however hard I tried to unscrew the base plug I couldn't get it to move. So I drilled two 2.5mm holes in the plug, (which I intended to fill with chemical metal) and made a tool to fit from a piece of spare bronze and a couple of ground down masonry pins. Unfortunately it still wont move and I'm not inclined to apply any more pressure in case of causing more damage. It's now soaking in WD 40.
Can anyone tell me where I'm going wrong here? The fuze is in lovely condition and I don't want to spoil it anymore than I already have. I dont want to section it as I've no idea how much of the original is still there, so cutting would need to be very carefully done to display the mechanism at it's best?
All suggestions greatly appreciated,
Festive best wishes to all,
Guy.