ekim199944
Well-Known Member
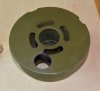
I needed a MIA1 mine for a display I was preparing and could only come up with a practice mine. So I decided to change its looks to what an actual mine looked like.
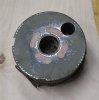
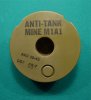
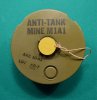
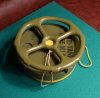
I drilled a hole in the top for the filler plug to go in, then I used Auto Body Putty to fill in the four holes that are on the top of a practice mine. I then put in the filler plug and repainted the mine. I hand cut the stencil for "ANTI-TANK MINE M1A1". I then set type for the "Lot Number Information, and had a rubber stamp made. I will dull down the black for this type as it seems too black. Finally I painted the bottom and 3/4" of the side in yellow, as per my Army TM manual. I think it turned out well. I would like to age it a bit, but I am not sure how I will do it right now.
I drilled a hole in the top for the filler plug to go in, then I used Auto Body Putty to fill in the four holes that are on the top of a practice mine. I then put in the filler plug and repainted the mine. I hand cut the stencil for "ANTI-TANK MINE M1A1". I then set type for the "Lot Number Information, and had a rubber stamp made. I will dull down the black for this type as it seems too black. Finally I painted the bottom and 3/4" of the side in yellow, as per my Army TM manual. I think it turned out well. I would like to age it a bit, but I am not sure how I will do it right now.