satan18
Well-Known Member
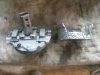
After sifting through a few 67s i have it was decided to take a few to bits
and see if i can get another sectional fuse done.
This will be in a few postings as i am still in the sorting stage.
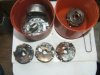
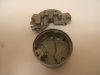
I had a fairly reasonable top that had a lot of corrosion on one edge
so i took slightly more out on the cut.
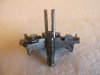
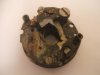
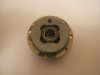
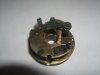
I have a few movements that i will clean up and decide on the best one to use.
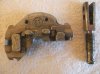
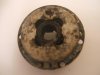
The base section is badly corroded on one side,which i can use as the cut edge.
I may experiment with a little bit of filler to take out the worst of the pitting,unless
i can emery it out.
and see if i can get another sectional fuse done.
This will be in a few postings as i am still in the sorting stage.
I had a fairly reasonable top that had a lot of corrosion on one edge
so i took slightly more out on the cut.
I have a few movements that i will clean up and decide on the best one to use.
The base section is badly corroded on one side,which i can use as the cut edge.
I may experiment with a little bit of filler to take out the worst of the pitting,unless
i can emery it out.
Attachments
Last edited:
")