What's new
British Ordnance Collectors Network

This is a sample guest message. Register a free account today to become a member! Once signed in, you'll be able to participate on this site by adding your own topics and posts, as well as connect with other members through your own private inbox!

british ww1 shell yellow

1

18pounder

Guest
Hi,just for information.
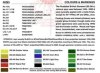
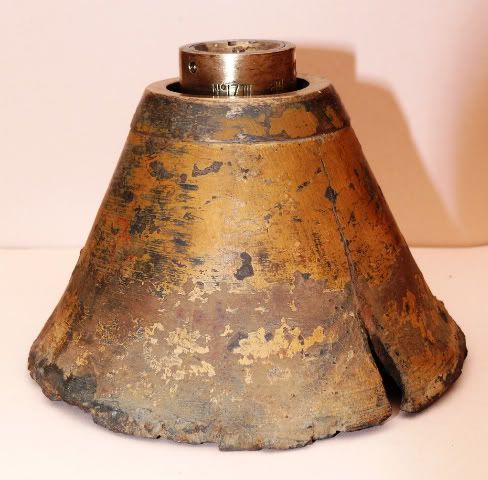
I have discovered a good mustard yellow for painting refurbed/rebuilt British ww1 era ordnance.
Humbrol also make various ww1 shades that appear to be good also.

Ive tried mixing my own shades to good effect,using images from the imperial war museum online images,but this appears to be a very close likeness.
Its Humbrol (those small modeling paints) number 124 yellow.
I use matt,so I have the option of using gloss varnish or matt.
Appying 3 or 4 thin coats with a large brush to minimise brush marks,I dont like spraying as the finish can look too "modern".
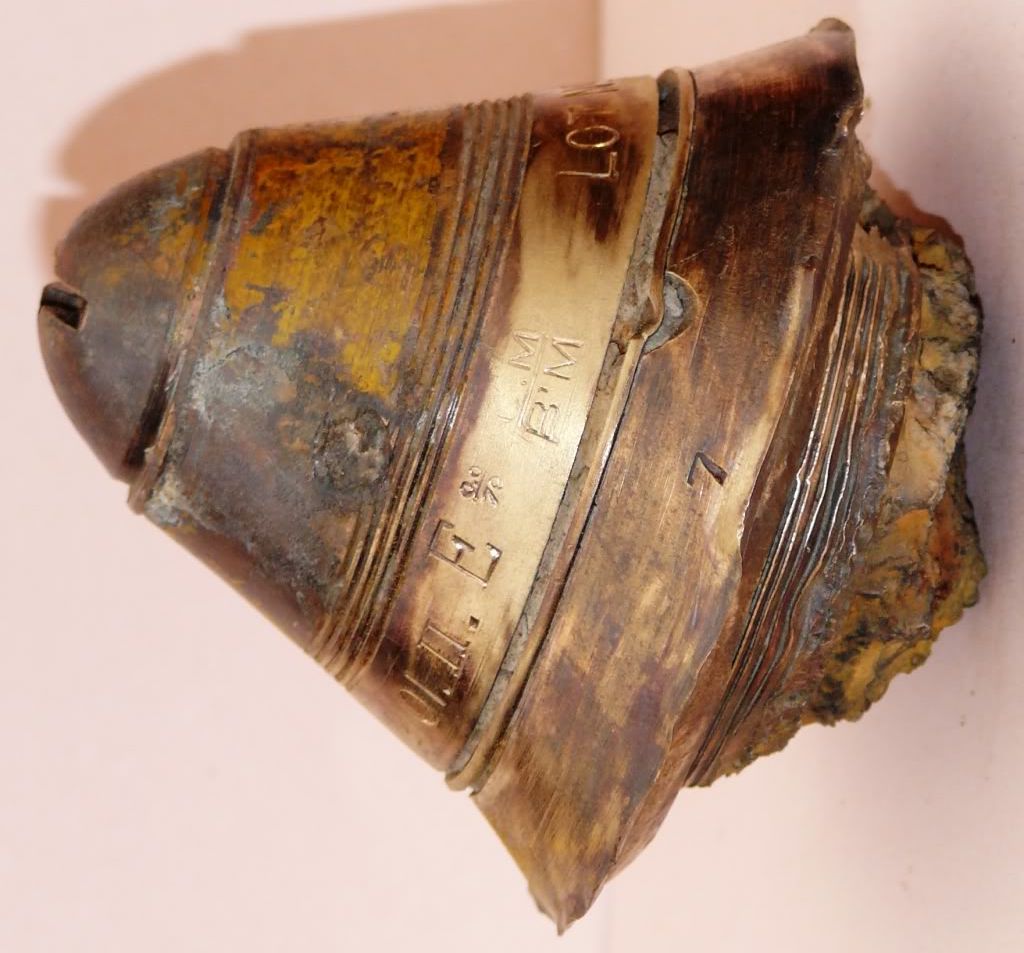
For badly damaged or heavily corroded items I use a two part metalised filler,that even feels cold to the touch and retains a grey steel look that is superior to normal filler,which is often white.
Thanks
18 pounder
 
The paints for British ammunition is mixed to BS.381c & can still mixed & put in to aerosol cans at some motor factors that do paint mixing
Here is a list off colour that can be used with the 25Pdr colour page.
BS.356 Golden Yellow HE Body colour & bands Pre 1939
BS.359 Middle Buff HE Body colour
BS.446 Red Oxide Primer & Incend Body
BS.537 Signal Red Filling bands & XXXX
BS.499 Service Brown Filling bands on some Smoke
BS.102 Turquoise Blue Practice body colour c1960
BS.104 Azure Blue HE Filling bands c1948
BS.642 Black Body colour AP,Star, Prac etc
BS.224 Bronze Green Body colour HE c1963 on & SMK Burst
BS.225 Lt.Br. Green Body colour Smoke
BS.217 Sea Green Band on SMK Burst

I hope this some use to you
Andy
 

Attachments

  • 1.jpg
    1.jpg
    20.3 KB · Views: 150
Last edited:
paint

thats great,very usefull, didnt realise you could do that.
I think all the shades will vary anyway,specially on original paint as age and enviromental conditions take their toll.
So i try not to worry about it too much,
thanks
18pounder
 
Hi 18 pdr, i found it very useful but like you i mixed my own using humbrol yellow and toned it down with some brown and finished it off with a matt varnish.
Cheers
Andy
 
heres an original recipe for the yellow.
YELLOW OCHRE 8LB 8OZ
TERPENTINE 1LB 8OZ
LIQUID DRIERS 2LB 8OZ
BOILED LINSEED OIL 1LB 6OZ
this will make a huge batch that will last for years.
cheers, paul.:tinysmile_shy_t:
 
bloody hell

how many shells u gonna paint??! u must hav ur own battery!!
 
ww1 yellow

jus finished using the yellow on another 18pounder,fantastic result...well chuffed.
 
HE yellow

for a quick job I've used from the local car acsessory shop the yellow spray primer, but dont spray it too well or as stated it looks too good to be true. You can spray into a small can and use a brush in the liquid caught but be quick and dont go over any bit just done or it will lift it and leave a mess.
 
18 pounder yellow.

PLEASE NOTE DISARMED AND MADE SAFE BY PROFESSIONAL,NOT BY ME.
:D
This shell in the original condition was in a poor state,it looked a typical 'dug' relic.
The iron body was very rusted with deep pits and impact damage.
The fuse was remakably intact and in very good condition.

The first task was to wash dirt from the shell as to see how much (if any) original paintwork or surface is present,as this would determine the scale of retoration.
I then proceeded to remove all rust with a rust removal wire drill bit.
After removing all the visible rust possible,I soaked the shell over night in a rust REMOVER. I DONT use rust treatment as this hardens rust and sets it,and doesnt remove it.

The last two images,you can see the metal filler on the base (to make it stand up!!) and the corosion of the iron.


After washing well with washing up liquid to remove grease, and letting dry over night, I 'plastered' on metal filler with a plastic knife on the entire shell body,and left dry over night,ensuring everything was covered (except threads!!).

Starting with a course sand paper wrapped in wooden block I started to rub the whole thing down.
Some of the original surface started to show through,so I used this as a guide to the correct shape.

I then used a flat electric sander to bring the surface level.
Its important to contantly move the sander so no flat spots are created.

I rolled the shell on a flat surface as one would use a rollin pin ,with the sander on top.
After getting the basic level it is important to check the surfacce for gaps and to patch up with more metal filler.

Steadily progress to very fine wet and dry until happy.

See my first image,this is prior to final sanding.

For the British ww1 yellow,I used humbrol num 124 matt yellow applied with a large artists brush in several coats.

Dont rush this and dont recoat untill previous coat is dry, otherwise the layers will drag up and leave a lumpy mess.

I decided not to paint the base of shell as to show the original surface damage and to prevent the paint from chipping off ,if i decided to get a shell case for it to sit in.

The red stripe to indicate 'filled' was humbrol matt red 153.
The green band indicating type of explosive, is humbrol matt green 149.

To mask and protect the painted surfaces i used black electrical tape as it stretches and conforms to curves very well.
I have tried using normal masking tape,but this doesnt work as the tape doesnt stretch and wrinkles ,breaks very easily.
To mask the threads,I stuffed a rolled up magazine into the neck of the shell.

After leaving the whole paintjob to dry over night,I finished the surface with Humbrol satin varnish spray.
This does two jobs.
Firstly protecting the surface and secondly 'flatts' out any paint surface inperfections in regards to light reflection.

I'm generally pleased with the finish,and tried not to get bogged down with the 'exact' colour scheme,as i believe is impossible due to varying pigments, atmospheric conditions and of course age.
Also I dont believe this should be a science as I'm sure in times of war, the shells painted by our ladies were not always perfect.
Thankyou
18pounder
 

Attachments

  • dougs bombs0013.jpg
    dougs bombs0013.jpg
    90.9 KB · Views: 89
  • dougs bombs0022.jpg
    dougs bombs0022.jpg
    87.5 KB · Views: 112
  • dougs bombs0024.jpg
    dougs bombs0024.jpg
    91.3 KB · Views: 81
  • dougs bombs0025.jpg
    dougs bombs0025.jpg
    82.6 KB · Views: 67
Last edited by a moderator:
This is the original color.This came out of the Flanders mud looking like this!A N17 fuze on a 60Pdr.This fuze whas used on shells filled with Lyditte.This is a very rare find!

nr173.jpg
 
yellow

great find..i wonder what nearly 90 years of being in the soil has done to change the colour.
What is the REAL colour?

Even if we can see originals kept in museums,all those years takes its toll.
As long as we can get a 'near as dam it' shade,I dont think its critical.

Picture is from imperial museum library,sent to me for reference.
 

Attachments

  • 18pdr_HE_Fixed_Round.jpg
    18pdr_HE_Fixed_Round.jpg
    10.1 KB · Views: 92
Last edited by a moderator:
WOW..looks even darker yellow than the one before,good find.
jus shows how the shades can vary.
thanks mate,very usefull.

Compare these to the image from the imperial war museum,the difrence is amazing,jus shows u what being buried does to paint.

My shell actually looks darker in real life,but the flash on my camera has bleached it out.

very usefull pic though,thanks
 
Last edited by a moderator:
shell

thankyou sir,you are very kind.
I hope folk enjoy it.
If anyone wants a more detailed selection of images,et me know
Doug
 
The coloured bands were painted by hand using a revolving jig table that the shell sat on. The brush was held agaist the revolving shell to apply the coloured band, thats how they marked up 2 and 3 inch mortar bombs. Some times the bombs or shells were rolled over a rubber painted stamp in a jig that marked the shells up.
 
bands...(not pink floyd)

didnt knw that,it would explain the untidy appearance of some bands,thanks
 
Top